A product configurator gives customers the feeling of creating their own unique product or customizing it to perfectly suit their needs using available parameters. The right color and material combination can significantly influence a purchasing decision, and an online configurator allows customers to explore these options effortlessly. Do different materials or colors complement each other? With a configurator, this can be tested within seconds. Additionally, by presenting all the product options upfront, a configurator helps reduce customer inquiries, streamlining the decision-making process.
3D model for product visualisation
A digital 3D model, as we create it, is a highly realistic digital replica of a product. The model is fully designed in 360 degrees, allowing us to use the product from any angle in the visuals. However, we only model what is actually visible; the interior of the product is omitted if it’s not seen. It’s a strange concept, but almost all the products you see in our images are, in fact, completely hollow on the inside.
How we do this
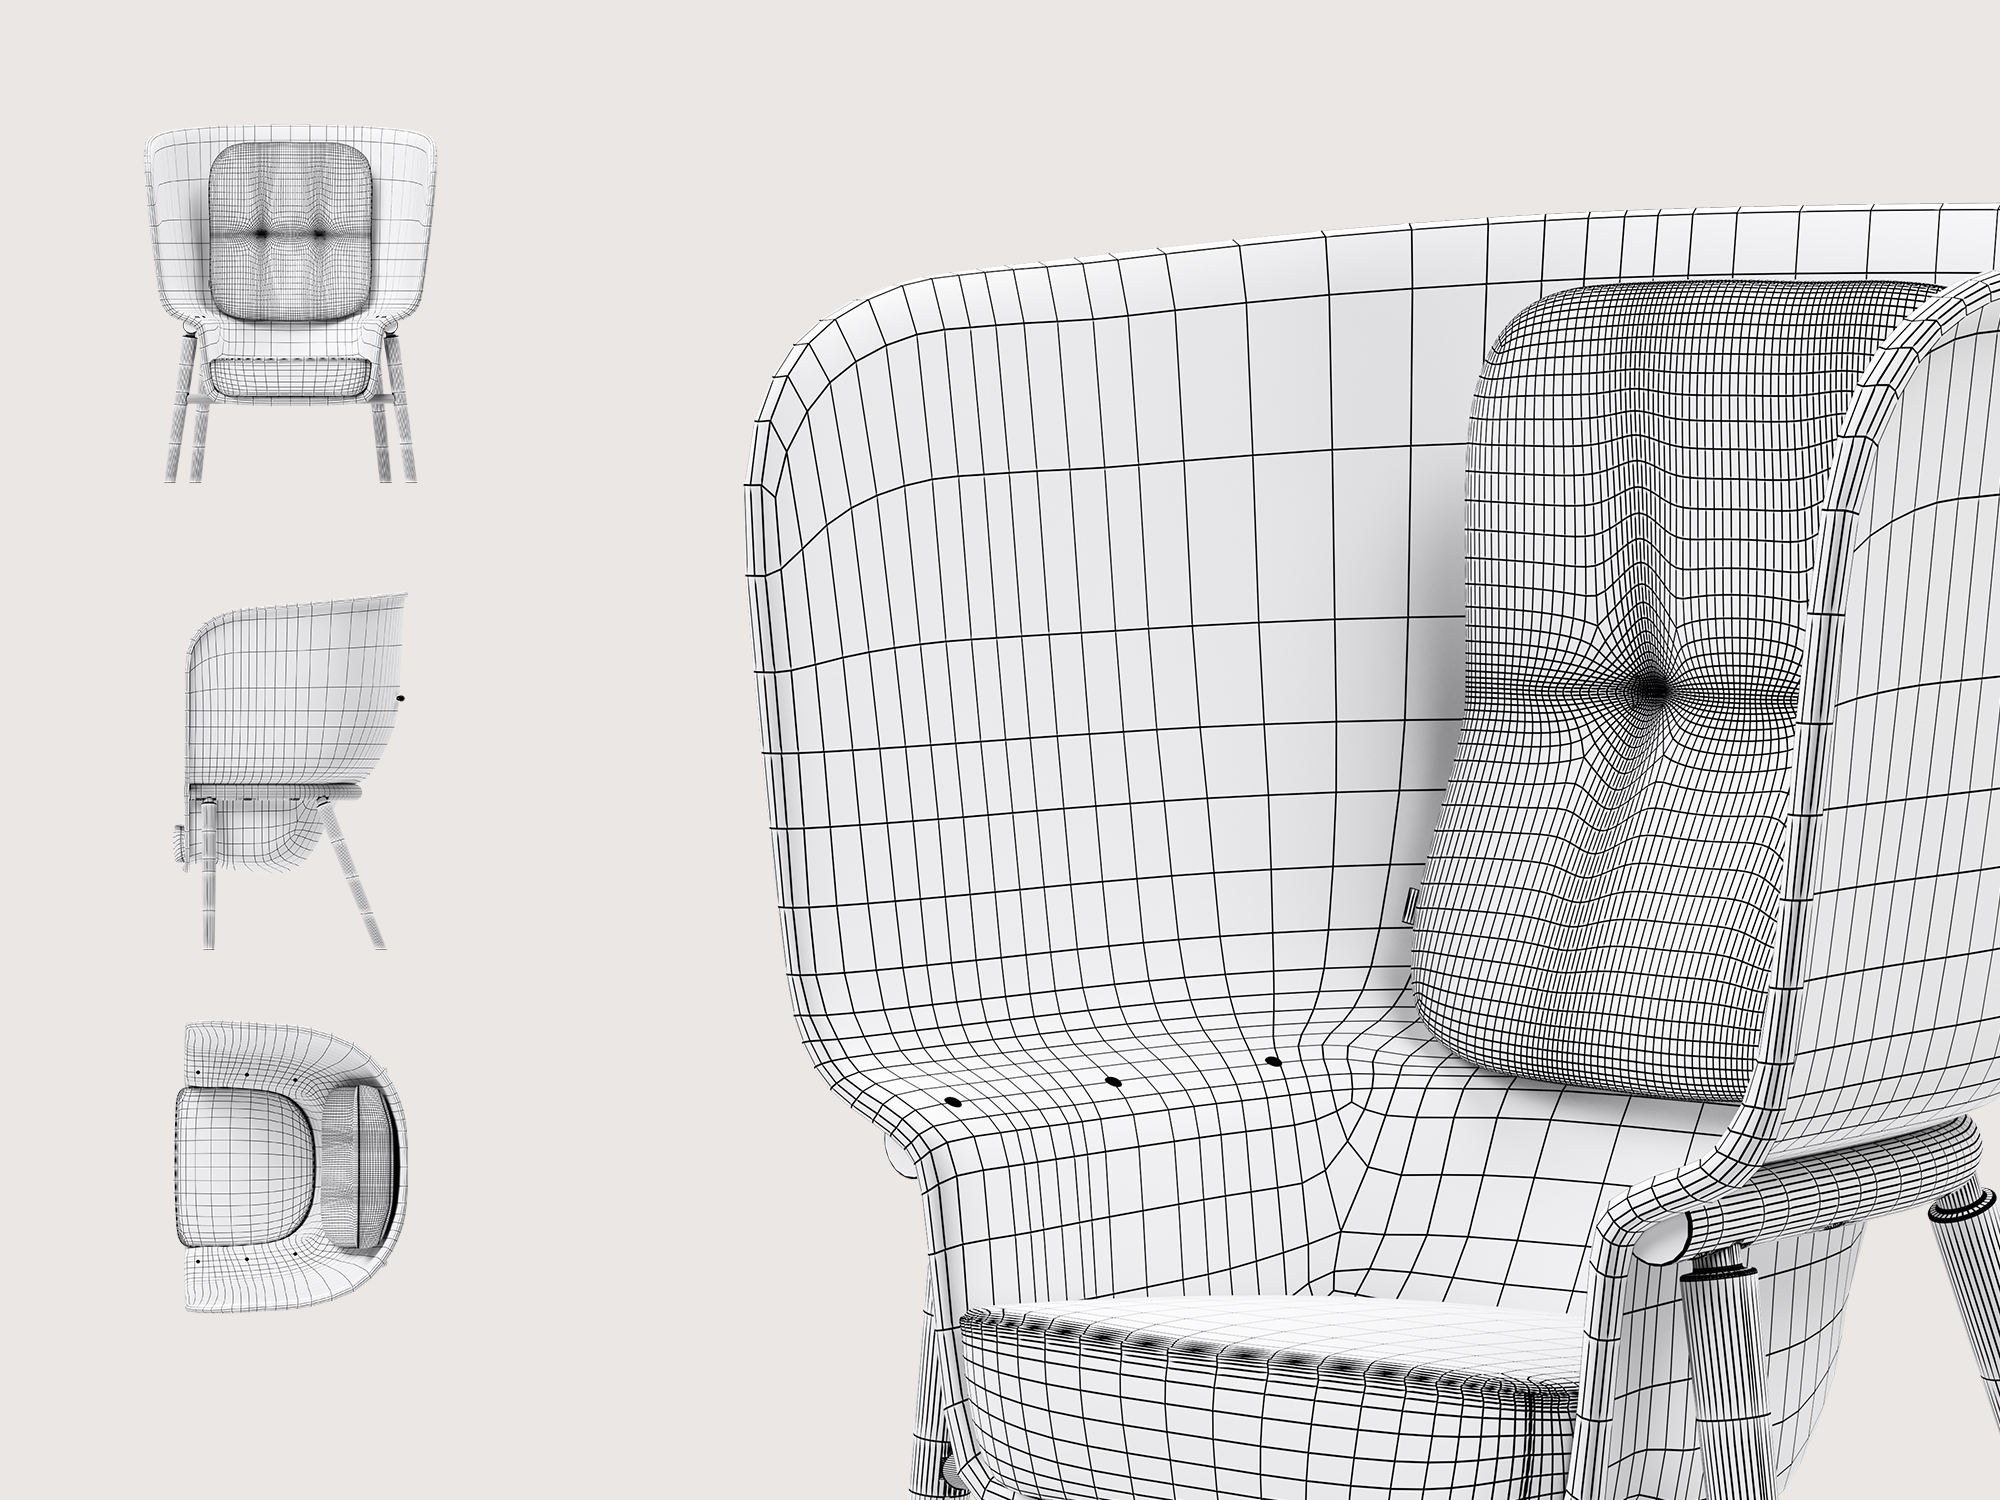
A 3D model is made up of polygons: flat surfaces with four corners that create a shape. For example, a simple cube in 3D consists of six surfaces, or six polygons. These polygons are clearly visible in the animation at the top of the page. Every 3D model starts with one of the basic shapes, such as a cube, cylinder, sphere, or plane. By adding more polygons and refining them, we can introduce greater detail and gradually build a digital replica of the product. This process feels a bit like sculpting with clay—you start with a rough form and step by step add more shapes and details.
Digital Tools
In the "real" world, you use tools like a drill or sander to make working with wood easier. When creating 3D models, we do something similar, but with digital tools called modifiers. These tools not only make our work easier but also open up a range of possibilities. For instance, we can round edges, smooth surfaces, simulate fabrics (like cushions sinking into a sofa), or duplicate products. Thanks to these modifiers, we work faster, more efficiently, and have greater control over the final result.
Realism
How do you make a 3D model look real? There are many factors at play, but what often makes or breaks a 3D model are the small details. As the saying goes, “The devil is in the details.” Think of weld seams, gaps, stitching, and other subtle elements. These details may barely be noticeable in real life, but the moment they’re missing, the model feels unnatural.
This creates an interesting contrast with photography. In photography, the goal is to achieve a flawless image, often removing imperfections in Photoshop. In 3D rendering, however, we do the opposite: we add imperfections to make the product look more realistic. For example, a weld seam is never perfectly smooth. Those slight irregularities create highlights in reflections, and it’s precisely these subtle details that bring the model to life.
Variations
Ctrl C, Ctrl V (copy and paste) is one of the best inventions since fire, and luckily, it works just as well with 3D models. It makes creating product variants much easier. Starting from a base model, you can make copies and adjust them as needed. By setting up the model cleverly, these changes can even be made days or months later. This way, a 3D model can remain useful for years.
For example, a leather version of an upholstered product might have different details, such as unique stitching. By copying the base model, you only need to adjust the upholstered section while keeping the rest of the product identical. Another application is creating products in various sizes. From one base model, you can develop an entire product line in 3D, making it perfect for assembling a complete catalog.
CAD vs Polygoon
You might think, "But we already have 3D models for production. Can’t you use those?" Yes, we can—but we’d prefer not to. CAD models from software like SolidWorks are built using Nurbs, rather than the polygons we work with. Nurbs are excellent for technical designs but less suitable for 3D visualizations.
When importing CAD models, Nurbs are converted into polygons. I often compare this to using Google Translate: very convenient, but not perfect. During the conversion, issues can arise in the 3D models, such as gaps, seams, and poorly fitting parts. This makes it difficult to add important details, like rounded edges, weld seams, or stitching.
Additionally, imported CAD files are highly inefficient in our 3D software. They can be up to ten times heavier, leading to longer render times and even causing crashes when used in a scene with multiple products and objects. Not exactly an ideal workflow.
That’s why we use CAD models only as a reference and rebuild all products from scratch using polygons. This ensures high-quality, realistic 3D visuals and a smooth, efficient workflow.
Concusion
A good 3D model is more than just a digital copy of a product; it serves as the foundation for our 3D visuals and animations. By leveraging the possibilities polygons offer, we can add the small details that truly bring the product to life. Additionally, by setting up the 3D model intelligently, updates can be implemented with ease over time. A well-crafted 3D model can be used for years to create compelling product visuals.